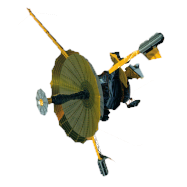
The Galileo Energetic Particles Detector
Galileo EPD Handbook
Chapter 1. Instrument Summary
EPD Commands
Also see Command Changes.
Source: Bob Moore, various dates
There are 256 command codes that are allocated to this experiment by JPL, not all of which are used. There are motor control commands and EPD commands.
Motor commands can cause the motor to:
1. Stop scanning.
2. Start scanning.
3. Set a new interval between steps.
4. Go in and out of the chicken mode. (The chicken mode
keeps the telescope behind the shield much of the time.)
5. Have its controller read out its own ROM or RAM to check
the memory contents.
6. Go into a modified scan mode. The modified scan mode
allows only specified sectors to be scanned. The specified
sectors are ground programmable.
7. Go into open and closed loop modes in case there is a
problem with the position encoder.
8. Go into an emergency mode in which the motor attempts to
go where it is commanded to go using the maximum amount of
power available for each step.
9. Go into a fast scan mode in which motor triggers arrive
every 2-2/3 seconds.
10. Go to any sector and stay there.
11. Respond to a set number of triggers and stop to debug a
possible problem.
12. Make the next sector change CW or CCW.
13. Reset via software or a hardware clear.
The EPD commands will:
1. Turn the LEMMS power on and off.
2. Turn each of the 8 LEMMS amplifiers on and off.
3. Turn the A detector bias on and off.
4. Turn the J' detector bias on and off.
5. Set the bias at normal or high levels.
6. Turn the CMS electronics on and off.
7. Turn the TOF electronics on and off.
8. Turn the PHA on and off.
9. Turn the motor driver on and off (but not the motor
controller).
10. Disable or enable the TOF logic conditions on the rate
logic.
11. Turn the CMS analog electronics on and off.
12. Choose the 0 degree or 180 degree end of CMS.
13. Cause the CMS to use the 0 degree and 180 degree ends
for alternate logical records.
14. Turn the instrument off and turn on heat generating
loads.
15. Program all thresholds for the alarm status monitor
function.
16. Override the priority system in the PHA so that it will
disable the ROM in the PHA and substitute a canned priority
that gets sent up with the command as data.
17. Interchange odd and even definitions for two packets in
a logical record so that in case the spacecraft
synchronization is not what it is expected to be, the
instrument can be resynchronized.
18. Put the motor into an accelerated scan mode where the
motor goes faster than normal. Triggers are sent to the
motor every 8/3 second to get the motor to step at a faster
rate to the sector designated as the end, stay there for 12
seconds and then come back.
19. Load the motor controller memory with one byte of
instructions which will allow problems in the ROM to be
patched around.
Eight-macro commands, which have not been defined yet, will be combinations of the commands that have been discussed. (Only four macros, specified 3/19/81, have been defined to simplify placing the instrument into a normal operating mode.)
The following list contains all of the Galileo EPD bus commands. Those commands preceded by an asterisk (*) are interactive commands. Those commands which have a second byte (bits 9-16) in addition to the op-code are data commands. The data symbol which represents the second byte can be one of 256 binary coded levels. Commands with op-codes less than 80 (hexadecimal) are destined for the EPD motor controller; commands with op-codes greater than 7F (hexadecimal) are destined for the EPD data system. Some of the commands which are executed by the data system also affect the motor controller; however, the internal communications between the motor controller and the data system do not involve the CDS bus or the EPD bus adapter. Commands listed with no mnemonic symbol are internal commands that do not involve the CDS.
Table 25. Galileo EPD Bus Commands
|
Field |
Op-Code Data |
|||
| Symbol | Value | Field Description | 1 2 3 4 5 6 7 8 | 9 10 11 12 13 14 15 16 |
| 25MTRG | 00 | Motor controller trigger | 0 0 0 0 0 0 0 0 | |
| 25RESC | 01 | Resume scanning | 0 0 0 0 0 0 0 1 | |
| 25NOSC | 02 | Cease scanning | 0 0 0 0 0 0 1 0 | |
| 25ALT | 03 | Alternate step rate on | 0 0 0 0 0 0 1 1 | |
| 25ALTR | 04 | Alternate step rate off | 0 0 0 0 0 1 0 0 | |
| 05 | 0 0 0 0 0 1 0 1 | |||
| 25CHK | 06 | Enter chicken mode | 0 0 0 0 0 1 1 0 | |
| 25CHKR | 07 | Exit chicken mode | 0 0 0 0 0 1 1 1 | |
| 08 | Call up motor TM byte 1 | 0 0 0 0 1 0 0 0 | ||
| 09 | Call up motor TM byte 2 | 0 0 0 0 1 0 0 1 | ||
| 0A | Call up motor TM byte 3 | 0 0 0 0 1 0 1 0 | ||
| 0B | Call up motor TM byte 4 | 0 0 0 0 1 0 1 1 | ||
| 0C | Call up motor TM byte 5 | 0 0 0 0 1 1 0 0 | ||
| 25RROM | 0D | Readout motor ROM | 0 0 0 0 1 1 0 1 | |
| 25RRAM | 0E | Readout motor RAM | 0 0 0 0 1 1 1 0 | |
| 25MCTR | 0F | Motor controller soft. reset | 0 0 0 0 1 1 1 1 | |
| 25MSC | 10 | Modified scan on | 0 0 0 1 0 0 0 0 | |
| 25MSCR | 11 | Modified scan off | 0 0 0 1 0 0 0 1 | |
| 25LOP | 12 | Enter open-loop mode | 0 0 0 1 0 0 1 0 | |
| 25LOPR | 13 | Exit open-loop mode | 0 0 0 1 0 0 1 1 | |
| *25EMG | 14 | Enter emergency mode | 0 0 0 1 0 1 0 0 | |
| *25EMGR | 15 | Exit emergency mode | 0 0 0 1 0 1 0 1 | |
| 16 | Motor fast scan on | 0 0 0 1 0 1 1 0 | ||
| 17 | Motor fast scan off | 0 0 0 1 0 1 1 1 | ||
| 25GO0 | 18 | Go to sector 0 | 0 0 0 1 1 0 0 0 | |
| 25GO1 | 19 | Go to sector 1 | 0 0 0 1 1 0 0 1 | |
| 25GO2 | 1A | Go to sector 2 | 0 0 0 1 1 0 1 0 | |
| 25GO3 | 1B | Go to sector 3 | 0 0 0 1 1 0 1 1 | |
| 25GO4 | 1C | Go to sector 4 | 0 0 0 1 1 1 0 0 | |
| 25GO5 | 1D | Go to sector 5 | 0 0 0 1 1 1 0 1 | |
| 25GO6 | 1E | Go to sector 6 | 0 0 0 1 1 1 1 0 | |
| 25GO7 | 1F | Go to sector 7 | 0 0 0 1 1 1 1 1 | |
| 25CW0 | 20 | CW end-sector=0 | 0 0 1 0 0 0 0 0 | |
| 25CW1 | 21 | CW end-sector=1 | 0 0 1 0 0 0 0 1 | |
| 25CW2 | 22 | CW end-sector=2 | 0 0 1 0 0 0 1 0 | |
| 25CW3 | 23 | CW end-sector=3 | 0 0 1 0 0 0 1 1 | |
| 25CW4 | 24 | CW end-sector=4 | 0 0 1 0 0 1 0 0 | |
| 25CW5 | 25 | CW end-sector=5 | 0 0 1 0 0 1 0 1 | |
| 25CW6 | 26 | CW end-sector=6 | 0 0 1 0 0 1 1 0 | |
| 25CW7 | 27 | CW end-sector=7 | 0 0 1 0 0 1 1 1 | |
| 25CCW0 | 28 | CCW end-sector=0 | 0 0 1 0 1 0 0 0 | |
| 25CCW1 | 29 | CCW end-sector=1 | 0 0 1 0 1 0 0 1 | |
| 25CCW2 | 2A | CCW end-sector=2 | 0 0 1 0 1 0 1 0 | |
| 25CCW3 | 2B | CCW end-sector=3 | 0 0 1 0 1 0 1 1 | |
| 25CCW4 | 2C | CCW end-sector=4 | 0 0 1 0 1 1 0 0 | |
| 25CCW5 | 2D | CCW end-sector=5 | 0 0 1 0 1 1 0 1 | |
| 25CCW6 | 2E | CCW end-sector=6 | 0 0 1 0 1 1 1 0 | |
| 25CCW7 | 2F | CCW end-sector=7 | 0 0 1 0 1 1 1 1 | |
| 25TRG0 | 30 | Respond to 0 triggers | 0 0 1 1 0 0 0 0 | |
| 25TRG1 | 31 | Respond to 1 trigger | 0 0 1 1 0 0 0 1 | |
| 25TRG2 | 32 | Respond to 2 triggers | 0 0 1 1 0 0 1 0 | |
| 25TRG3 | 33 | Respond to 3 triggers | 0 0 1 1 0 0 1 1 | |
| 25TRG4 | 34 | Respond to 4 triggers | 0 0 1 1 0 1 0 0 | |
| 25TRG5 | 35 | Respond to 5 triggers | 0 0 1 1 0 1 0 1 | |
| 25TRG6 | 36 | Respond to 6 triggers | 0 0 1 1 0 1 1 0 | |
| 25TRG7 | 37 | Respond to 7 triggers | 0 0 1 1 0 1 1 1 | |
| 25ENFS | 38 | Enter full scan | 0 0 1 1 1 0 0 0 | |
| 25ENLS | 39 | Enter limited scan | 0 0 1 1 1 0 0 1 | |
| 25SCW | 3A | Set direction clockwise | 0 0 1 1 1 0 1 0 | |
| 25SCCW | 3B | Set direction CCW | 0 0 1 1 1 0 1 1 |
Return to Galileo EPD Handbook Table of Contents Page.
Return to main
Galileo Table of Contents Page.
Return to Fundamental
Technologies Home Page.
Updated 8/23/19, Cameron Crane
QUICK FACTS
Mission Duration: Galileo was planned to have a mission duration of around 8 years, but was kept in operation for 13 years, 11 months, and 3 days, until it was destroyed in a controlled impact with Jupiter on September 21, 2003.
Destination: Galileo's destination was Jupiter and its moons, which it orbitted for 7 years, 9 months, and 13 days.


